
Master Wood Burning Paste: Create Stunning Dragon Coasters
Wood burning is a beautiful craft, but traditional pyrography tools can take years to master. If you are looking for a simpler way to get crisp, professional results, wood burning paste is the answer. This clever product allows you to "burn" intricate designs into wood using a stencil and a heat gun.
In this guide, you will learn the secrets to achieving a perfect finish every time. We will cover two different styles: a classic burnt silhouette on natural wood and a shimmering gold-painted version. Whether you are making a gift for a friend or something for your own coffee table, these dragon coasters are a fantastic project to start with.
The secret to success with burning paste isn't just the paste itself; it’s all in the preparation. By following a few simple steps—sanding, using vinyl stencils, and applying thin layers—you can avoid the common problems of bleeding, bubbling, or patchy finishes.
Steps
Phase 1: Preparing the Wood
Sand the Surface: Start with plywood coasters and give them a light sand using fine-grit sandpaper. This removes invisible splinters and oils from your fingers that might stop the paste from sticking.
Clean Away Dust: Use a cloth to wipe away all the sanding dust. Any leftover dust will create a barrier between the wood and your design.
Apply Your Stencil: Take your vinyl design (cut using a machine like a Cricut) and press it onto the wood. Use a spatula or scraper to rub it down firmly.
Seal the Edges: Use a soft cloth or tissue to rub the edges of the vinyl one last time. This ensures the seal is tight so the paste cannot bleed underneath.
Phase 2: Applying the Paste
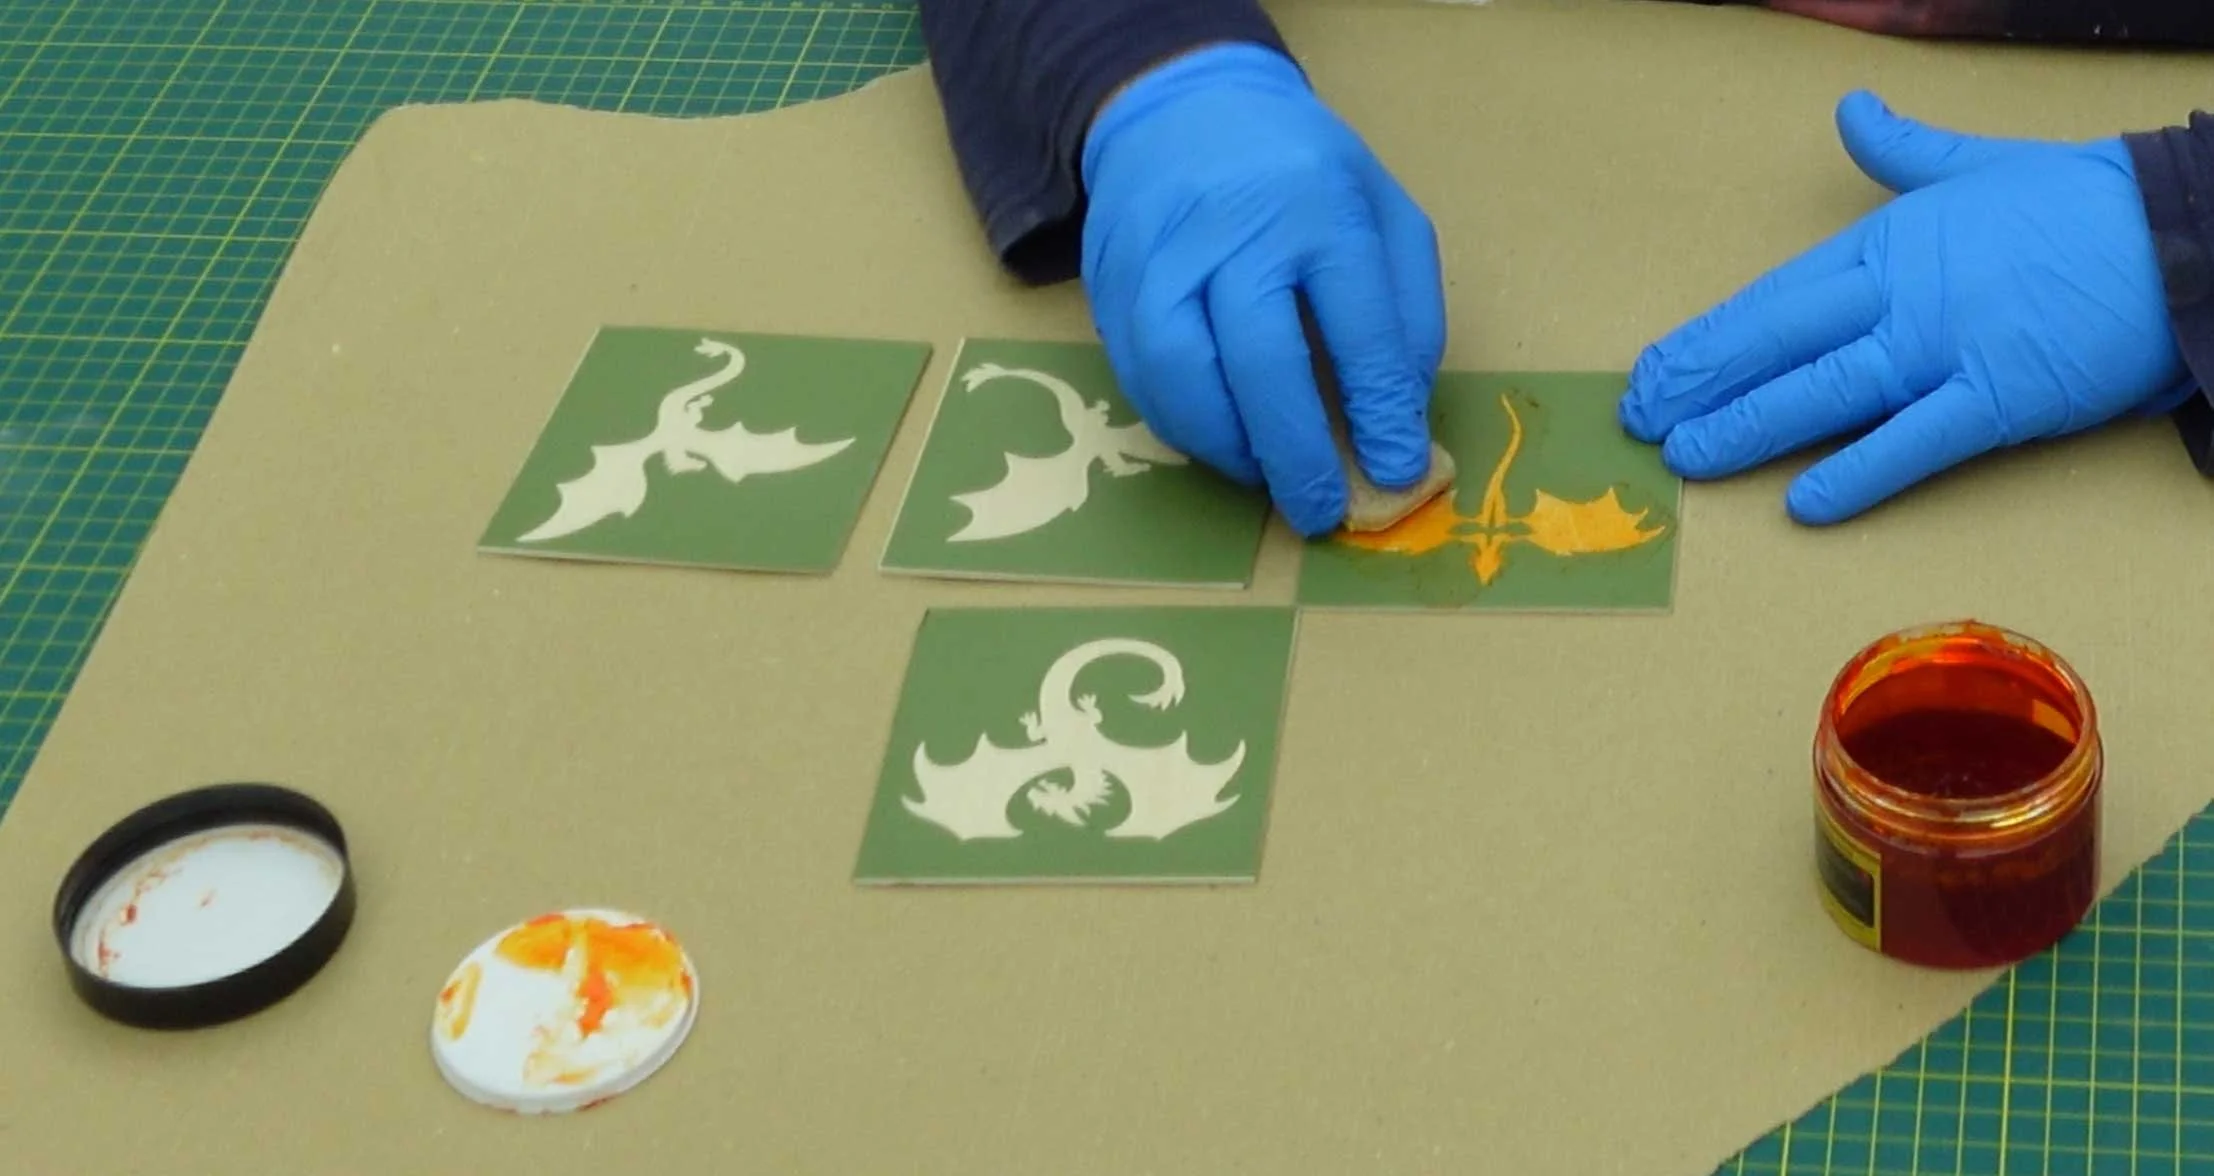
Sponge on a Thin Layer: Put on your gloves. Use a small piece of sponge (like a kitchen scourer) to dab a very thin, even layer of paste over your design. Avoid using a brush, as it can apply the paste too thickly.
Dry Thoroughly: Let the paste dry. You can speed this up by using a hair dryer. Do not use a heat gun yet, as the paste must be completely dry before it is burnt.
Add a Second Coat: Apply a second very thin layer of paste and dry it again.
Clean the Vinyl: Before removing the stencil, wipe any excess paste off the top of the vinyl. This prevents accidental smears on the clean wood.
Phase 3: The Burn
Remove the Stencil: Carefully peel away the vinyl to reveal your design.
Heat the Wood: Using a heat gun on a heat-proof surface (like a ceramic tile), warm the wood. Keep the gun moving constantly to avoid scorching the surrounding areas.
Develop the Design: Focus the heat on the paste until it turns a deep, burnt black. Stop as soon as you reach the desired colour to prevent over-burning.
Phase 4: The Painted Method (Optional)
If you want a metallic look, follow these extra steps:
Mask the Edges: Apply blue masking tape around the edges of the coaster.
Paint: Apply two thin coats of acrylic paint (like gold) and let it dry completely—ideally overnight—so the vinyl doesn't pull the paint off.
Apply Paste and Burn: Follow the same stencil and burning steps as above. The gold will shimmer through the burnt design for a mythical effect.
Phase 5: Finishing
Seal Your Work: Once the coasters are cool and dry, apply a light spray of clear sealer. Move in one direction, then the other, to ensure full coverage. This protects the wood and makes them ready for use.
Tips
Thin is King: Always apply the paste in thin layers. If it is too thick, it will bubble up and dry unevenly.
Safety First: Wood burning creates fumes. Always work in a well-ventilated room or use an air purifier/extractor fan.
Temperature Control: Use a hair dryer for drying and a heat gun only for the final burning stage.
Avoid Fingerprints: Once you have sanded the wood, try not to touch the surface with your bare hands, as natural oils can affect the finish.
FAQs
Can I use a stencil instead of vinyl?
While you can use plastic stencils taped down, they are more likely to let the paste bleed underneath. Vinyl provides a much crisper, professional edge.
Why is my paste bubbling?
Bubbling usually happens if the paste is applied too thickly or if it wasn't completely dry before you started using the heat gun.
What kind of wood works best?
Most real woods and plywood work well. Lighter woods provide the best contrast for the black burnt design.
How do I stop the wood around the design from scorching?
Keep your heat gun moving at all times. Don't hold it in one spot for too long, and stop heating as soon as the paste has turned black.
Tools and Materials
📌 As an Amazon Associate, I earn from qualifying purchases:
(USA) Here is my amazon store for the USA
(UK) Here is my Amazon Store for the UK
Individual links below for the items used in this video:
LINKS FOR USA ONLY
(USA) Burning Paste: https://amzn.to/3ProXXL
(USA) Coaster Blanks: https://amzn.to/4lXNtvN
(USA) Sandpaper: https://amzn.to/4c93X0u
(USA) Cricut Machine: https://amzn.to/4rRw1Kt
(USA) Resiners Heat Gun: https://resiners.com/?ref=r1ere84v
(USA) Acrylic Paint: https://amzn.to/4bYIsP0
(USA) Spray Varnish: https://amzn.to/486dAKX
LINKS FOR UK ONLY
(UK) Burning Paste: https://amzn.to/4sAfYSp
(UK) Coaster Blanks: https://amzn.to/40UnY4P
(UK) Sandpaper: https://amzn.to/4svgvFk
(UK) Cricut Machine: https://amzn.to/47ZzOhL
(UK) Resiners Heat Gun: https://resiners.com/?ref=r1ere84v
(UK) Acrylic Paint: https://amzn.to/4dKUPQW
(UK) Spray Varnish: https://amzn.to/4uUwzCf