
How to Make Perfect DIY Bath Bombs: A Beginner-Friendly Guide
Have you ever tried a hobby kit only for it to end in a crumbly, fizzy disaster? You aren't alone! Many store-bought kits lack clear instructions or quality ingredients, leading to bath bombs that foam up too early or fall apart.
Making your own bath bombs from scratch is not only more reliable, but it is also incredibly cost-effective. By purchasing the raw ingredients yourself, you can make dozens of high-quality bath bombs for the price of a small shop-bought pack. In this guide, you will learn a "fool proof" recipe to create hard, fragrant, and professional-looking bath bombs right in your own kitchen.
What You Will Need
Before you begin, gather your supplies. Using the right tools, like sturdy silicone moulds instead of flimsy plastic ones, will make a huge difference to your final result (links at end of post).
Dry Ingredients:
1 cup Bicarbonate of Soda
1/4 cup Corn Starch
1/2 cup Citric Acid
Wet Ingredients:
8ml Essential Oils (e.g., a blend of Bergamot and Sweet Orange)
2ml Carrier Oil (such as Grapeseed oil)
Polysorbate 80 (an emulsifier that prevents the oils from making the bath slippery)
5ml Tap water (this helps the bombs set hard)
Optional: Cosmetic-grade mica powder or food colouring for a splash of colour
Steps
1. Mix Your Wet Ingredients
Start by blending your wet ingredients in a small container. Mix the essential oils, carrier oil, Polysorbate 80, and water. Stir them until they are fully emulsified; the mixture should look slightly waxy and well-combined.
2. Prepare the Dry Base
In a large mixing bowl, add your bicarbonate of soda. Sift in the cornstarch to ensure there are no lumps. Mix these two together thoroughly. If you are using a powder-based colourant like mica, you can add it at this stage.
3. Combine the Wet and Dry
Slowly pour your wet mixture into the bicarbonate of soda and cornstarch. Use your hands to work the liquid into the powder, ensuring the colour and moisture are evenly distributed.
4. Add the Citric Acid
This is a vital tip: add the citric acid after you have mixed the other liquids with the bicarbonate of soda. This reduces the chance of the mixture fizzing up prematurely in the bowl.
5. Check the Consistency
Squeeze a handful of the mixture together. It should feel like wet sand and hold its shape. If it feels too dry or crumbly, give it a few light sprays of water and mix again until it reaches the right "clumping" consistency.
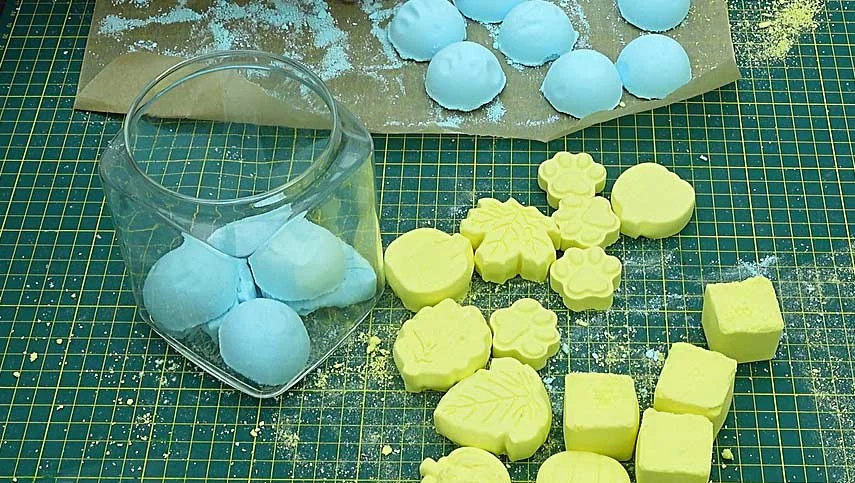
6. Fill Your Moulds
Pack the mixture into your moulds. It is best to use a spoon to firmly press the mixture down. The harder you pack it, the better the final result will be. Work quickly so the mixture doesn't dry out while you are still filling the moulds.
7. The Drying Process
Patience is key! Leave your bath bombs to dry in their moulds for at least 24 to 48 hours. Removing them too early, especially from silicone moulds, can cause them to crumble or lose their shape.
Tips
Emulsify Well: Always use Polysorbate 80. It helps the oil and water mix, which ensures the oils disperse in the bath water rather than floating on top and making the tub dangerous.
Mind the Humidity: On very humid days, your mixture might react to the moisture in the air. You may need to adjust your liquids slightly to get that "wet sand" feel.
Storage is Key: Once dry, store your bath bombs in an airtight jar or tin. This keeps them dry and preserves the scent for your next relaxing soak.
Deep Moulds: Sturdier, deeper moulds (like silicone ice cube trays or themed baking moulds) are often easier to use than the thin plastic spheres found in cheap kits.
FAQs
Why did my bath bomb foam up while it was still in the mould?
This usually happens if the mixture is too wet or if the citric acid reacted with the water too early. To prevent this, try adding the citric acid last and use a spray bottle for water to avoid over-saturating the mix.
How long do DIY bath bombs take to dry?
While it is tempting to check them after an hour, it is best to wait 24 to 48 hours. This ensures they are hard all the way through and won't crumble when you pop them out of the mould.
Can I use any oil for the carrier oil?
Yes, simple oils like grapeseed oil work well because they are light and soak into the skin nicely without being overly greasy.
Tools and Materials
📌 As an Amazon Associate, I earn from qualifying purchases:
(USA) Here is my amazon store for the USA
(UK) Here is my Amazon Store for the UK
Individual links below for the items used in this video:
LINKS FOR USA ONLY
(USA) Bicarbonate of Soda: https://amzn.to/4bwPt9h
(USA) Citric Acid: https://amzn.to/4rFA9NG
(USA) Grapeseed Oil: https://amzn.to/4sWc0n3
(USA) Polysorbate 80 Oil: https://amzn.to/4rF0NGg
(USA) Corn Starch: https://amzn.to/4srLwKu
(USA) Colouring: https://amzn.to/3NagCqE
(USA) Fragrance Oils For Bath Bombs: https://amzn.to/41duFPh
(USA) Bath Bomb Mold: https://amzn.to/4uzhMwJ
(USA) Square Mold: https://amzn.to/4rKjZ5M
(USA) Leaf Mold: https://amzn.to/4sh5x6b
(USA) Dog Paw Mold: https://amzn.to/4uF5PVY
LINKS FOR UK ONLY
(UK) Bicarbonate of Soda: https://amzn.to/3NfPgPU
(UK) Citric Acid: https://amzn.to/479JMwM
(UK) Grapeseed Oil: https://amzn.to/4bkMylo
(UK) Polysorbate 80 Oil: https://amzn.to/4sjK78x
(UK) Corn Starch: https://amzn.to/4bSWrXu
(UK) Colouring: https://amzn.to/41ds2Np
(UK) Fragrance Oils For Bath Bombs: https://amzn.to/4bxObe3
(UK) Bath Bomb Mould: https://amzn.to/47dNg1k
(UK) Square Mould: https://amzn.to/4lGAUVo
(UK) Leaf Mould: https://amzn.to/3Pjaa19
(UK) Dog Paw Mould: https://amzn.to/4sUvQz4