How to Stop Dried Flowers Floating in Resin: A Game-Changing Craft Trick
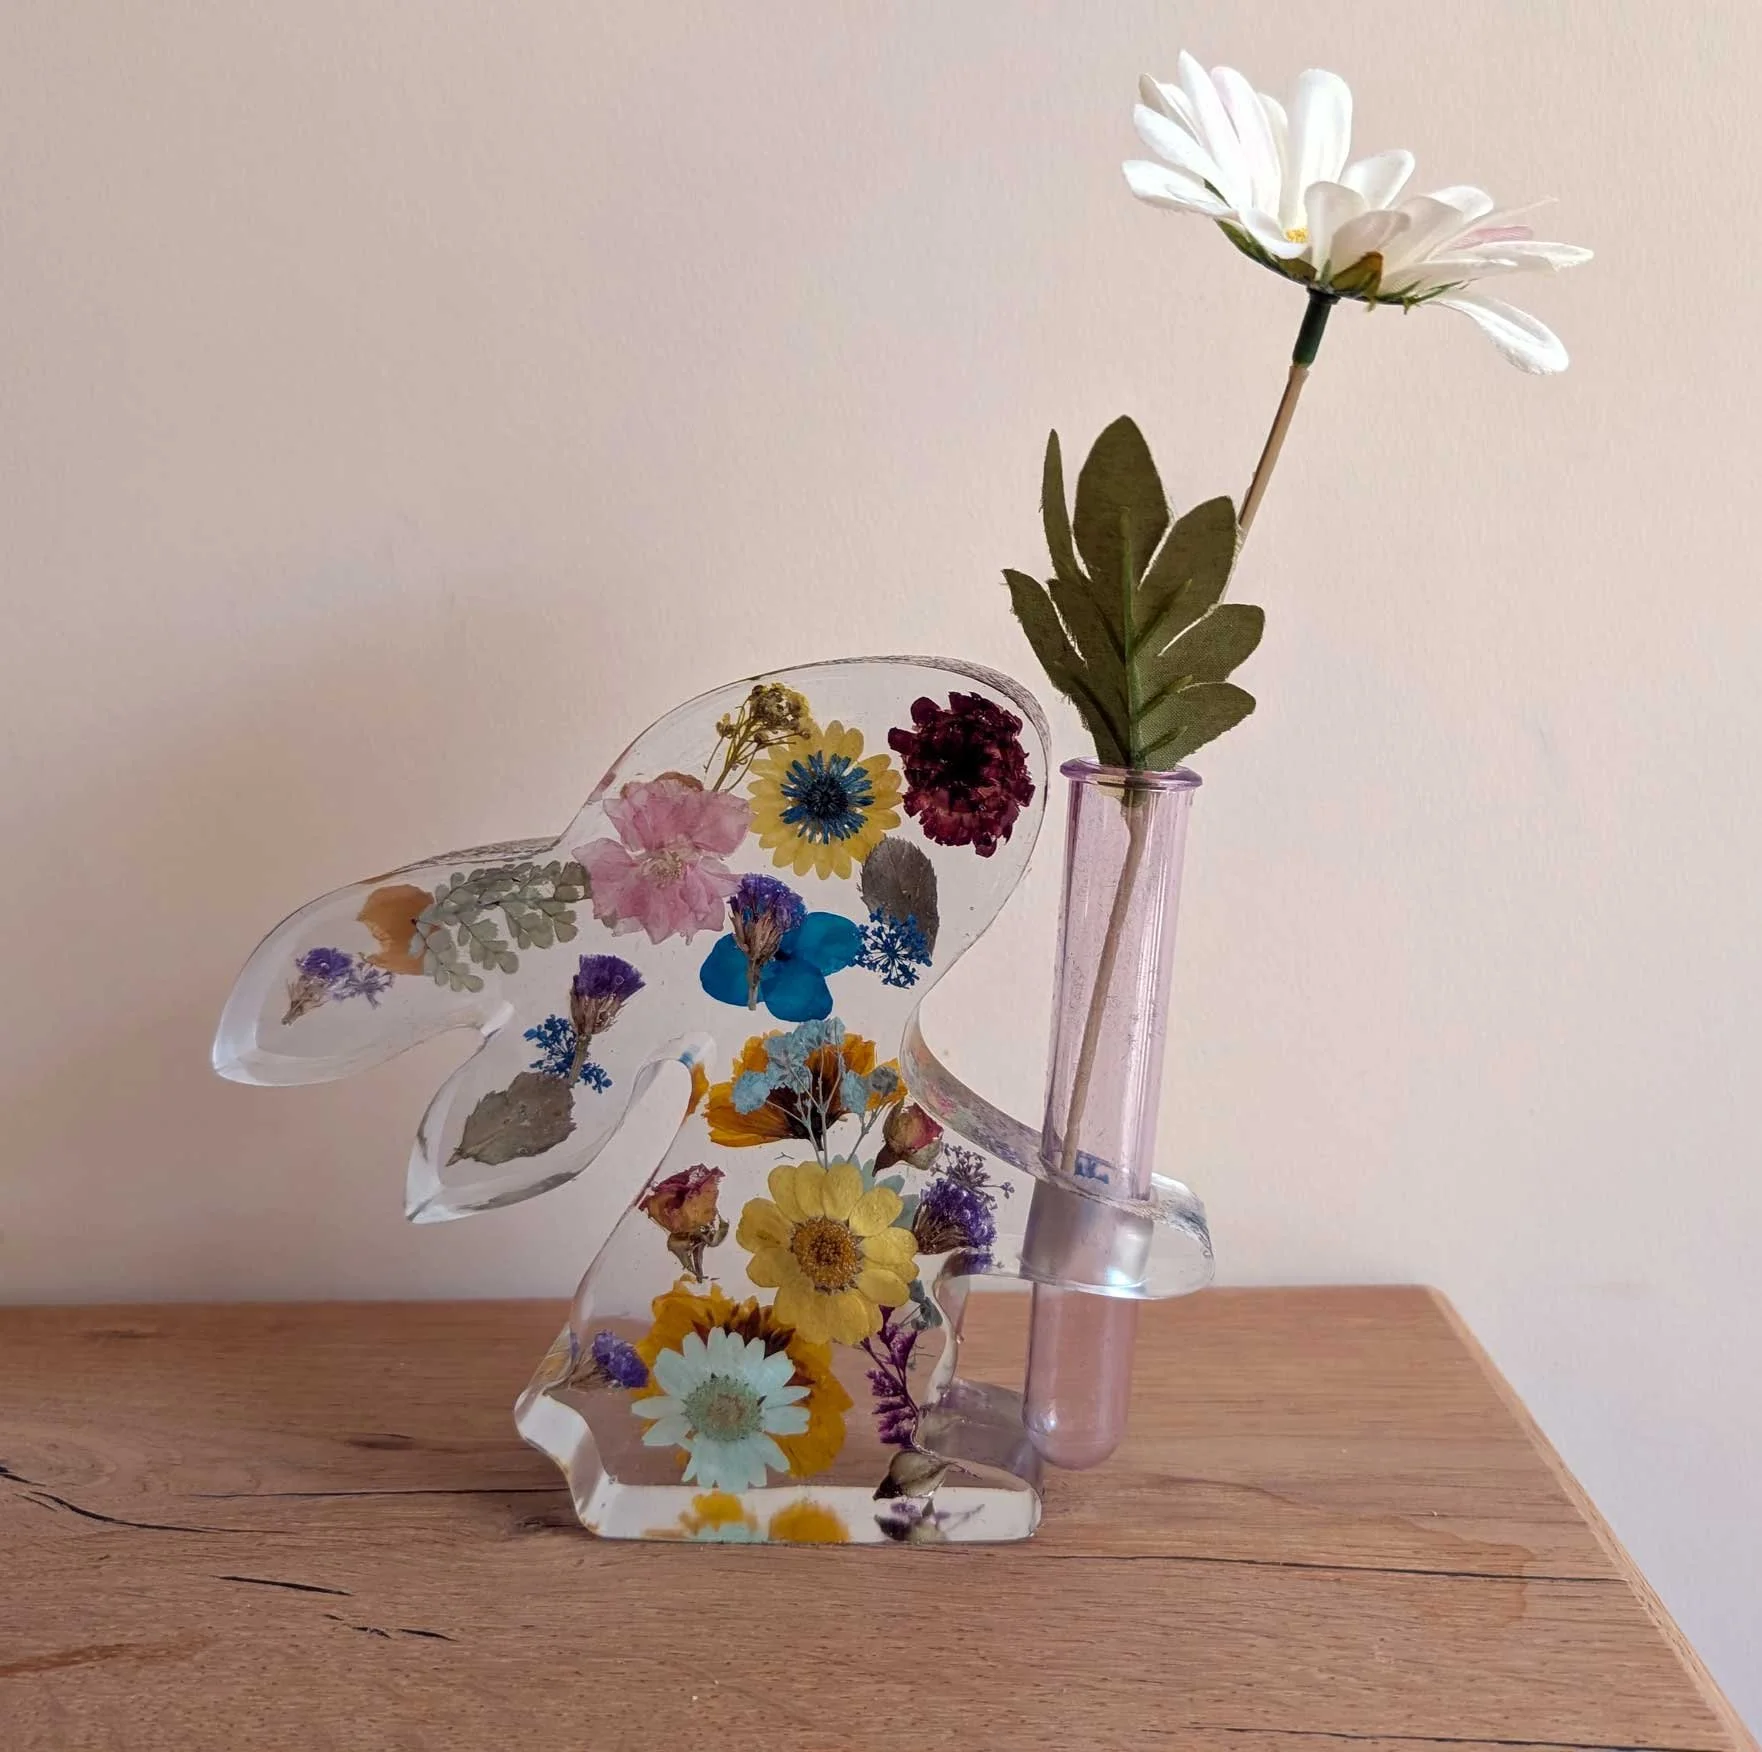
Dried flowers look beautiful encased in crystal-clear resin, but they present a common, frustrating problem for crafters: they refuse to stay where they are put. Because dried flowers are incredibly light, they trap air easily. When you pour your liquid resin, the flowers float right to the top, shifting out of position and releasing a constant trail of bubbles that can spoil your finished piece.
Fortunately, a simple priming method can completely solve this issue. By sealing your botanical pieces before casting them, you can add weight, trap unruly petals, and gain total control over your design. This guide walks through the step-by-step process of using a UV dip resin technique to secure flowers in a silicone rabbit-shaped vase mold, creating a gorgeous, layered effect without any floating or bubble contamination.
Steps
This project involves two main phases: priming the flowers with a thick UV resin and then casting them in layers using a standard two-part epoxy resin.
Phase 1: Sealing the Flowers with UV Resin
Before starting your main pour, you must seal your dried flowers to create a protective barrier that stops air from escaping.
Prepare the curing tray: Take the tray for your double-sided UV lamp and give it a quick spray with mold release. This ensures that any accidental drips will peel off easily after curing.
Dip the flowers: Choose an assortment of dried flowers. Take each flower and dip it straight down into a thick UV dip resin. Lift it out slowly and allow the excess resin to drip back into the container.
Pop trapped bubbles: Check the coated petals for any trapped air bubbles. If you see any, use a pair of fine tweezers to gently pop or remove them.
Coat the stems: Only dip the flowers as far up the stem as you need. For a compact mold, keep the stems quite short by coating just the lower portion.
Cure the coating: Place the dipped flowers onto the treated tray under your UV light. Turn the lamp on for three to five minutes until the resin is fully cured and hardened. Once finished, they will peel off the tray easily, completely sealed and weighted.
Phase 2: Layering the Epoxy Resin Cast
Once your flowers are prepped, you can begin the main casting process using a high-gloss 1:1 epoxy resin. This project uses a silicone rabbit mold designed to hold a glass test tube, turning the finished piece into a single-stemmed flower vase.
Insert the test tube accessory: Silicone vase molds come with a small plastic or silicone tube insert. Ensure this insert is pushed completely into the mold before pouring. This preserves the vital gap needed to slide the test tube into place at the end.
Mix and pour the first layer: Mix your 1:1 epoxy resin thoroughly and run it through a degassing machine if you have one. Pour the clear resin very slowly into the mold until it is roughly halfway full.
Clear corner bubbles: Use a silicone tool to gently trace the inside edges and corners of the mold. This dislodges any air bubbles that get caught in tight spaces, allowing them to rise to the surface to be popped.
Place the first layer of flowers: Take your pre-coated UV flowers and place them carefully into the liquid resin. Wiggle them slightly with your tool to ensure no fresh air is trapped underneath the petals. Arrange them deliberately—for example, placing a tiny flower where the rabbit's eye or nose will be.
Wait for the gel stage: Leave the first layer to cure until it reaches a thick, sticky "gel" stage. It should be firm enough to hold objects in place but liquid enough to blend seamlessly with the next pour.
Position the middle layer: Gently place a few more flat or upright flower pieces into the sticky resin. Because the resin has thickened, these pieces will stay suspended exactly where you put them, creating beautiful depth and distinct visual layers.
Pour the final layer: Mix and degas a fresh batch of epoxy resin. Pour it slowly over the gelled layer, filling the mould to the top.
Conduct a final bubble check: Leave the mould for about ten minutes to allow any final bubbles to surface. Pop them, then leave the entire piece to cure completely undisturbed.
Demould and finish: Once fully cured, gently pull the edges of the mould away. Squeeze the internal tube insert together to slide it out, leaving a perfect channel. Slide your glass test tube into the gap, add a single-stem flower, and enjoy your perfectly cast piece!
Tips
Keep resin invisible: You do not need to worry about the UV resin showing on your finished piece. Once the clear liquid epoxy cures around the pre-treated flowers, the UV coating becomes completely invisible, leaving only the crisp detail of the flower itself.
Watch the clock for layering: To avoid a harsh, visible line between your two resin pours, pour your second layer when the first batch is highly sticky. If you pull a small bit up with a tool and it stays roughly pulled up but remains slightly fluid, it is at the perfect stage to bond without lines.
Work around structural gaps: When arranging flowers in a vase mould, keep the placement of the test tube channel in mind. Avoid placing oversized flowers directly where the tube will sit, as this can crowd the shape and distort the design.
Trim overpours carefully: If you have a slight hand tremor or overfill the mould, resin may spill onto the edges. Simply take a small craft blade after demoulding and carefully slice away the thin flashing for a neat finish.
FAQs
Why do dried flowers cause bubbles in epoxy resin?
Dried flowers are incredibly light and porous. Their petals and centres naturally trap microscopic pockets of air. When submerged in liquid epoxy resin, the heat from the chemical reaction causes the air to expand, creating a constant trail of bubbles that get stuck as the resin thickens.
Do I have to use a UV dip resin to seal the botanicals?
Yes, using a specific thick UV dip resin is highly effective because it provides a instant, heavy coating. It seals the porous surfaces completely and cures under a UV lamp in just a few minutes, meaning you do not have to wait hours for a traditional epoxy sealant to dry before starting your main project.
How can I tell if my resin has reached the correct gel stage?
You can test the resin by gently touching the surface with a mixing tool. If you pull the tool away and the resin forms a sticky peak that holds its shape slightly rather than flattening back out immediately, it has reached the ideal gel stage for suspending your middle-layer flowers.
Will the seam line show if I pour my resin in two separate sessions?
If you wait until the first layer is completely cured and hard, you will often see a distinct line where the two batches meet. However, if you pour the second layer while the first pour is still in its thick, sticky gel stage, the two layers chemically bond together, making the seam line virtually invisible.
Tools and Materials
📌 As an Amazon Associate, I earn from qualifying purchases:
(USA) Here is my amazon store for the USA
(UK) Here is my Amazon Store for the UK
Or see the individual links below for the items used in this video:
LINKS FOR USA ONLY
(USA) JDiction High Gloss Resin: https://amzn.to/4nE1BuF
(USA) UV Dipping Resin: https://amzn.to/4uoesE7
(USA) UV Lamp: https://amzn.to/3RajzZV
(USA) Rabbit Mould: https://resiners.com/?ref=r1ere84v
(USA) Resiners Discount Code: Steve Resiners
(USA) Flowers: https://resiners.com/?ref=r1ere84v
(USA) Resiners Discount Code: Steve Resiners
(USA) Silicone Tools: https://amzn.to/4umPWDp
(USA) Resiners Air Purifier Lite: https://resiners.com/?ref=r1ere84v
(USA) Resiners Discount Code: Steve Resiners
(USA) Resiners Air Purifier Lite Amazon Link: https://amzn.to/3RQmiI0
(USA) Resiners Air Purifier: https://resiners.com/?ref=r1ere84v
(USA) Resiners Discount Code: Steve Resiners
(USA) Resiners Air Purifier Amazon Link: https://amzn.to/3RRNVjS
LINKS FOR UK ONLY
(UK) JDiction High Gloss Resin: https://amzn.to/3RmEbOw
(UK) UV Dipping Resin: Coming Soon
(UK) UV Lamp: https://amzn.to/4dxSabQ
(UK) Rabbit Mould: https://resiners.com/?ref=r1ere84v
(UK) Resiners Discount Code: Steve Resiners
(UK) Flowers: https://resiners.com/?ref=r1ere84v
(UK) Resiners Discount Code: Steve Resiners
(UK) Silicone Tools: https://amzn.to/4uXMLlk
(UK) Resiners Air Purifier Lite: https://resiners.com/?ref=r1ere84v
(UK) Resiners Discount Code: Steve Resiners
(UK) Resiners Air Purifier Lite Amazon Link: https://amzn.to/3PNR5EO
(UK) Resiners Air Purifier: https://resiners.com/?ref=r1ere84v
(UK) Resiners Discount Code: Steve Resiners
(UK) Resiners Air Purifier Amazon Link: https://amzn.to/4uQV5TK