
How to Use the 'Soap Bubble' Technique to Decorate ResinCrete
Have you ever seen potters on television use bubbles to create incredible, organic patterns and wondered if you could do the same at home? This fascinating technique, often seen on shows like The Great Pottery Throwdown, uses simple soap bubbles to deposit pigment onto a surface, creating a look that is entirely unique.
In this guide, we will explore how to adapt this ceramic trick for ResinCrete. Whether you are a seasoned crafter or just starting with eco-resins, this method offers a fun, unpredictable, and professional-looking way to elevate your handmade bowls and trays. You will learn how to mix the right bubble solution, apply the "stolen" technique, and seal your work for a gallery-worthy finish.
The bubble technique involves mixing pigment or paint with water and dish soap, then blowing air into the mixture to create a mound of colourful bubbles. When these bubbles land on your ResinCrete piece and pop, they leave behind delicate, overlapping circular outlines.
The result is a Mediterranean-style pattern that looks like it belongs in a high-end art gallery. Because the bubbles pop at different times, no two pieces will ever look the same.
Steps
1. Cast Your ResinCrete Piece
Start by mixing your ResinCrete. A reliable ratio is 100g of powder to 30g of water. Use a fork to mix the ingredients; this helps break up lumps and ensures a smooth, even consistency. Pour the mixture slowly into your mold to avoid trapping air, and give the sides a gentle tap to release any bubbles. Let the piece cure for 1.5 to 2 hours before removing it from the mold.
2. Ensure the Piece is Dry
Before decorating, your bowl must be fully dry. A great tip is to touch the surface: if it feels cold, it likely still contains moisture. Wait until it reaches room temperature. You can speed up this process by placing it in a warm curing box or a warm spot in your home for a few hours.
3. Prepare the Base Colour (Optional)
While you can apply bubbles directly to a white ResinCrete surface, applying a base coat of pigment first can make the colours pop. Use concentrated ResinCrete pigments to paint the surface. Allow this base layer to dry completely before moving on to the bubbles.
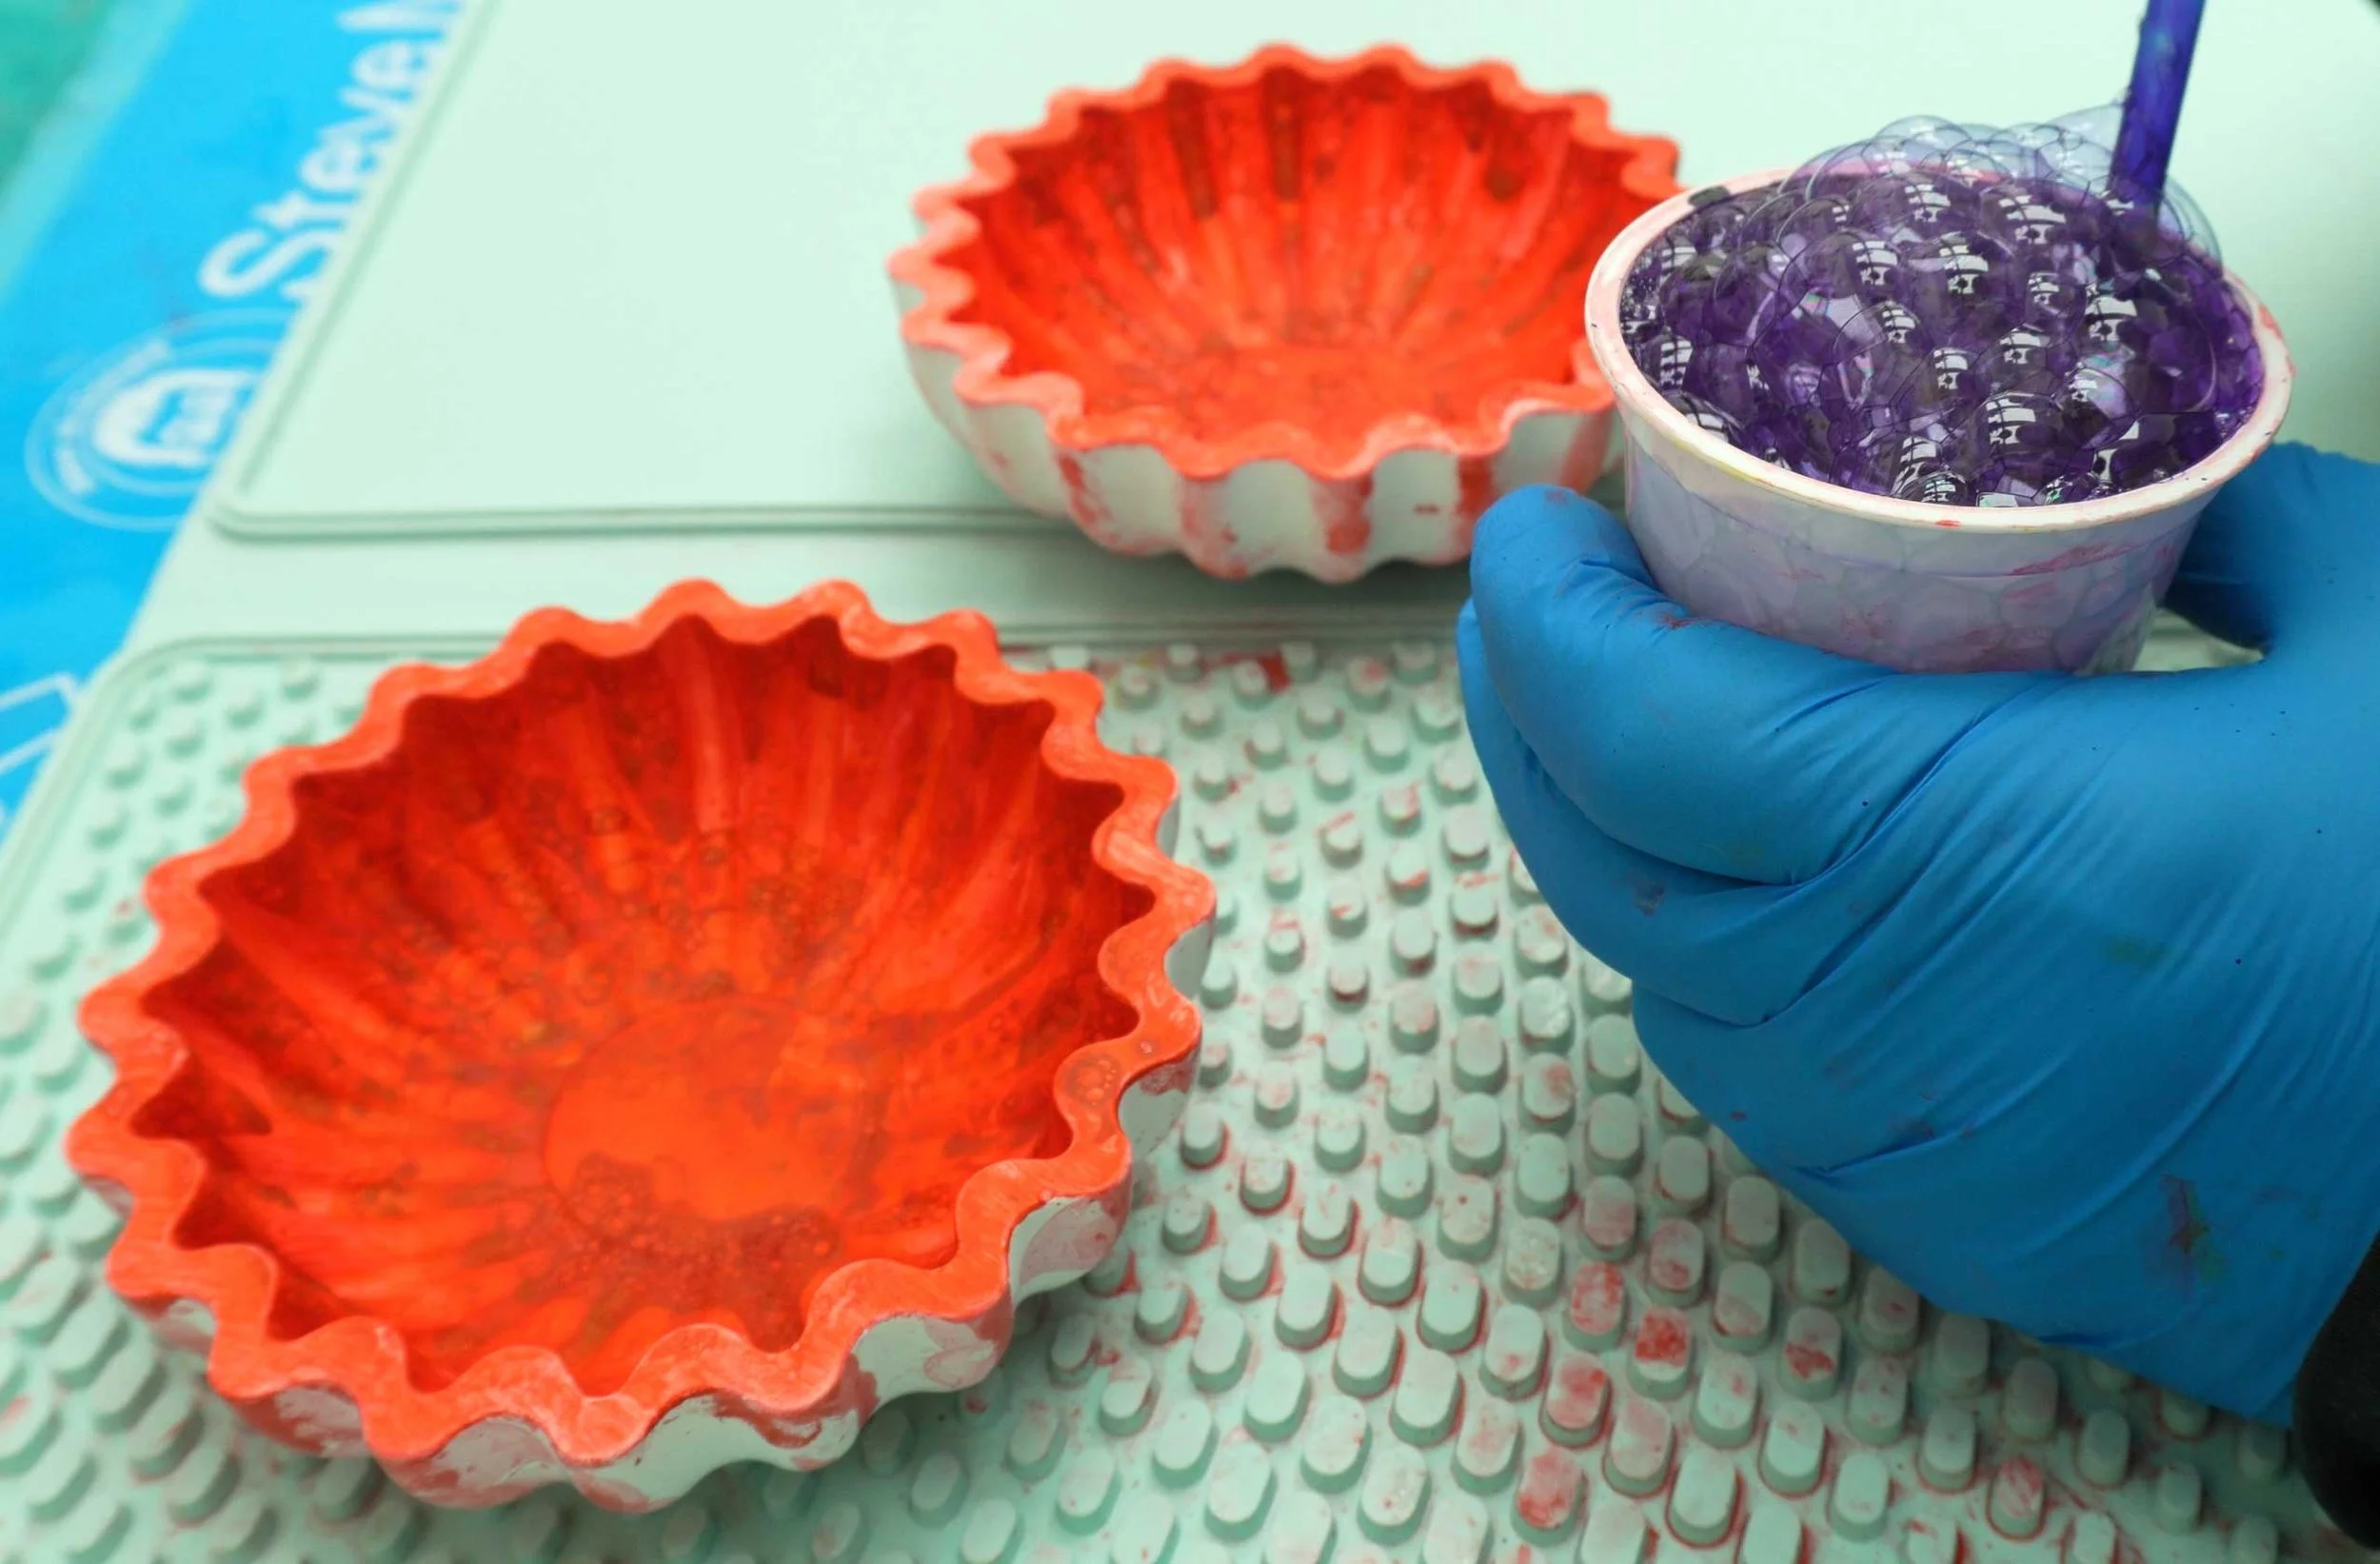
4. Mix Your Bubble Solution
In a round pot, mix the following:
Water
ResinCrete Pigment (for deep, saturated colour)
Dish Soap (Washing-up liquid)
The goal is a 1:1 ratio of liquid to dish soap. If the bubbles burst too quickly, add a little more soap. If they are too thick, add a touch more water.
5. Apply the Bubbles
Using a straw, gently blow into the mixture to create a "head" of bubbles. Once the bubbles rise above the rim of the pot, you can "slice" them off or let them overflow onto your piece.
Pro Tip: Lightly mist your ResinCrete piece with a water sprayer first. The bubbles sit much better and last longer on a slightly damp surface, allowing the pigment to settle into a clearer pattern.
6. Layer and Dry
Let the first layer of bubbles pop and dry naturally. You can then repeat the process with different colours, such as red, yellow, or blue. Be patient—letting the bubbles burst on their own is what creates the intricate "lace" effect.
7. Seal Your Work
To protect the pattern and make the colours vibrant, you must seal the piece. Use a high-quality Yacht Varnish (available in matte, satin, or gloss). Apply two coats to the inside and two to the outside in a well-ventilated area, leaving about 15 minutes between coats.
Tips
Avoid Over-Soaping: Too much dish soap can make the bubbles too heavy. Start with a small amount and increase it until you get a stable bubble.
Blow Slowly: If you blow air too fast, the bubbles will be fragile and pop instantly. Slow, steady air creates stronger bubbles that leave better patterns.
Use Round Pots: Round containers make it much easier to blow and manage the bubbles compared to square or triangular ones.
Protect Your Base: If you don't seal the bottom of your bowl, adhesive felt pads won't stick well. Always apply a quick coat of sealer to the base if you plan on adding a felt bottom.
FAQs
Does it matter if I seal the ResinCrete before or after the bubble technique?
In testing, there is no significant difference in the final look whether you seal the piece before or after applying the bubbles. However, sealing after decorating is essential to lock in the pigment.
What kind of paint should I use?
Concentrated ResinCrete pigments work best because they are highly saturated. This ensures that even the thin walls of a bubble carry enough colour to leave a visible mark on your project.
Is this technique waterproof?
The bubbles themselves are not waterproof. To make your bowl waterproof (for example, to use it as a vase), you must apply at least two coats of a professional sealer like Yacht Varnish or a specialized eco-resin sealer.
How do I know if my ResinCrete is ready to be decorated?
Touch the piece with your hand. If it feels cold to the touch, it is still evaporating moisture. Wait until it feels like it is at room temperature before you start painting or bubbling.
Tools and Materials
📌 As an Amazon Associate, I earn from qualifying purchases:
(USA) Here is my amazon store for the USA
(UK) Here is my Amazon Store for the UK
Individual links below for the items used in this video:
LINKS FOR USA ONLY
(USA) ResinCrete: https://amzn.to/40Kjb5L
(USA) Bowl Mould: https://amzn.to/4bLdKJ4
(USA) ResinCrete Colors/Pigments: https://amzn.to/4bnED6H
(USA) ResinCrete Sealer: https://amzn.to/47ckq1c
(USA) Spray Varnish: https://amzn.to/3NCv36W
(USA) Scales: https://amzn.to/4rQq5Bz
(USA) Sticky Backing Felt: https://amzn.to/4sVKnua
(USA) Cricut Maker: https://amzn.to/41eCNiC
LINKS FOR UK ONLY
(UK) ResinCrete: https://amzn.to/4rI3FSU
(UK) Bowl Mould: https://amzn.to/4bC6ejg
(UK) ResinCrete Colours/Pigments: https://amzn.to/4uy0CiO
(UK) ResinCrete Sealer: https://amzn.to/4sWsfAv
(UK) Spray Varnish: https://amzn.to/3NDWL33
(UK) Scales: https://amzn.to/4rPL6MP
(UK) Sticky Backing Felt: https://amzn.to/3PjQDxz
(UK) Cricut Maker: https://amzn.to/4uMzNaY