
How to Create a Vibrant I-Cord Rug: A Step-by-Step Guide
Have you ever looked at a bundle of colourful wool and wondered how to turn it into something functional and stylish for your home? If you own an I-cord maker, you have a powerful tool that can transform yarn into a thick, squishy rug in just a few hours.
Making an I-cord rug is a fantastic project for hobbyist crafters. It is much faster than traditional knitting or crochet, and the result is a durable, professional-looking mat perfect for a bedside or a cosy nook. In this guide, you will learn how to produce metres of I-cord quickly, how to stitch them into a classic oval shape, and how to add a neat fabric backing for a high-quality finish.
Your Guide to Making an I-Cord Rug
This project is broken down into two main phases: creating the I-cord "rope" and then assembling it into a rug. By using a mechanical I-cord maker, you can produce over 50 metres of cord in about an hour, which is significantly faster than hand-knitting.
What You Will Need (links at end of post)
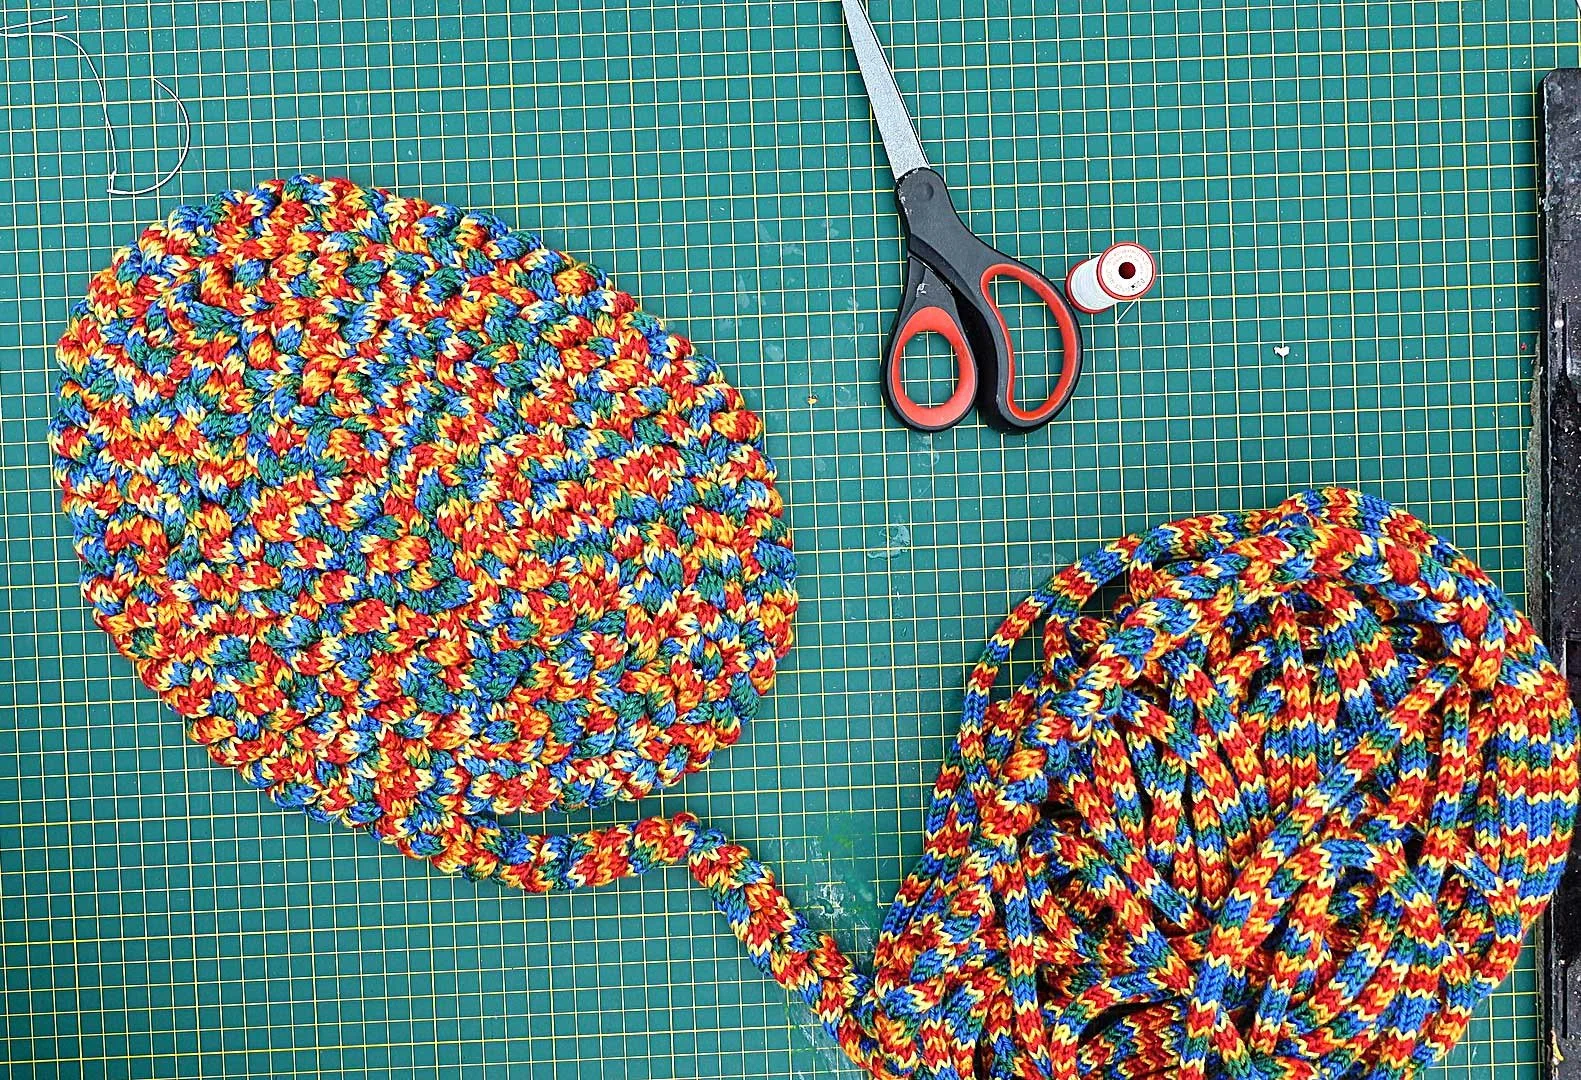
Wool: Approximately 5-6 balls of colourful yarn (around 233m per ball).
I-Cord Maker: A mechanical knitting mill.
Needles: A curved sewing needle for the rug assembly and a darning needle for the backing.
Thread: Extra-strong cotton thread and your leftover wool.
Backing Fabric: An old curtain or a sturdy piece of fabric.
Tools: Scissors, a permanent marker, and an iron.
Steps
1. Prepare the I-Cord
Set up your I-cord maker and run your wool through it at full speed. To join a new ball of wool, simply tie a tight knot between the end of the old strand and the start of the new one. Trim the ends very short and run the machine slowly until the knot passes through the needles. For a medium-sized rug, aim for at least 50 to 100 metres of cord.
2. Create the Centre Loop
To start the rug, create a small loop at the end of your I-cord. Secure this loop by sewing it together with extra-strong cotton. This loop acts as the "anchor" for your oval shape.
3. Form the Foundation Loops
Run the I-cord through your initial loop to create a series of new loops, similar to a crochet chain. For an oval rug, aim for about 16 to 18 loops in this foundation row. Keep the loops a consistent size to ensure the rug stays flat.
4. Stitch the Rug Together
Using your curved needle and strong thread, begin sewing the long length of I-cord to the edge of your foundation loops. Work in a spiral, going round and round.
Pro Tip: Use a curved needle to catch the edges of the cord more easily.
Invisible Stitches: Aim to hide your stitches between the cords so the thread isn't visible from the front.
5. Prepare the Backing
Once your rug reaches the desired size, lay it flat on your backing fabric. Use a permanent marker to trace around the rug. Cut the fabric slightly inside the line you drew.
6. Hem and Attach the Backing
To prevent the fabric from fraying, fold the edges over and iron them down to create a neat hem. Place the backing onto the underside of the rug. Using your leftover wool and a darning needle, use a blanket stitch to secure the fabric to the I-cord. This hides the messy underside and gives the rug a uniform, finished shape.
Tips
Don't Pull Too Tight: When sewing the cords together, avoid pulling the thread too tightly. If the tension is too high, the rug will warp and won't lay flat on the floor.
Check Your Flatness: Every few rows, lay the rug on a flat surface to make sure it isn't "cupping" or waving.
Manage the Joins: When using a mechanical I-cord maker, keep a close eye on your knots as they pass through the machine to ensure they don't get caught in the latch hooks.
Fabric Choice: Using a recycled material like an old curtain for the backing is an eco-friendly and cost-effective way to add stability to your project.
FAQs
How long does it take to make an I-cord rug?
Once you have made the I-cord, you can typically sew the rug together in a single afternoon. Producing the cord itself takes about an hour per 50 metres using a machine.
What kind of wool is best for this project?
Any standard colourful wool works well. Using budget-friendly yarn is a great idea since a rug requires a large volume of material.
Why does my rug have a backing?
A backing fabric hides the stitching on the underside, prevents the rug from stretching out of shape, and helps it sit more securely on the floor.
Do I need a specific needle for sewing?
A curved needle is highly recommended for the assembly stage. It allows you to scoop through the sides of the I-cord more easily than a straight needle when the rug is lying flat.
Tools and Materials
📌As an Amazon Associate, I earn from qualifying purchases:
(USA) Here is my amazon store for the USA
(UK) Here is my Amazon Store for the UK
Individual links below for the items used in this video:
LINKS FOR USA ONLY
(USA) Caydo Icord Machine: https://amzn.to/4chgIXC
(USA) Wool: https://amzn.to/4ch4Ncb
(USA) Sewing Kit: https://amzn.to/3OBlV2y
(USA) Sharpie: https://amzn.to/4b7zzmN
(USA) Sewing Machine: https://amzn.to/46seLnt
LINKS FOR UK ONLY
(UK) Caydo Icord Machine: https://amzn.to/4cKdzQ8
(UK) Wool: https://amzn.to/46VRQkw
(UK) Sewing Kit: https://amzn.to/4aE3q6i
(UK) Sharpie: https://amzn.to/4kXi8sj
(UK) Sewing Machine: https://amzn.to/46ndIFm